

The fastest way to create a note starts by swiping on the patient and selecting New Scribe. To continue adding to an existing note, use Resume Note instead.Documentation Index
Fetch the complete documentation index at: https://docs.pro.commure.com/llms.txt
Use this file to discover all available pages before exploring further.
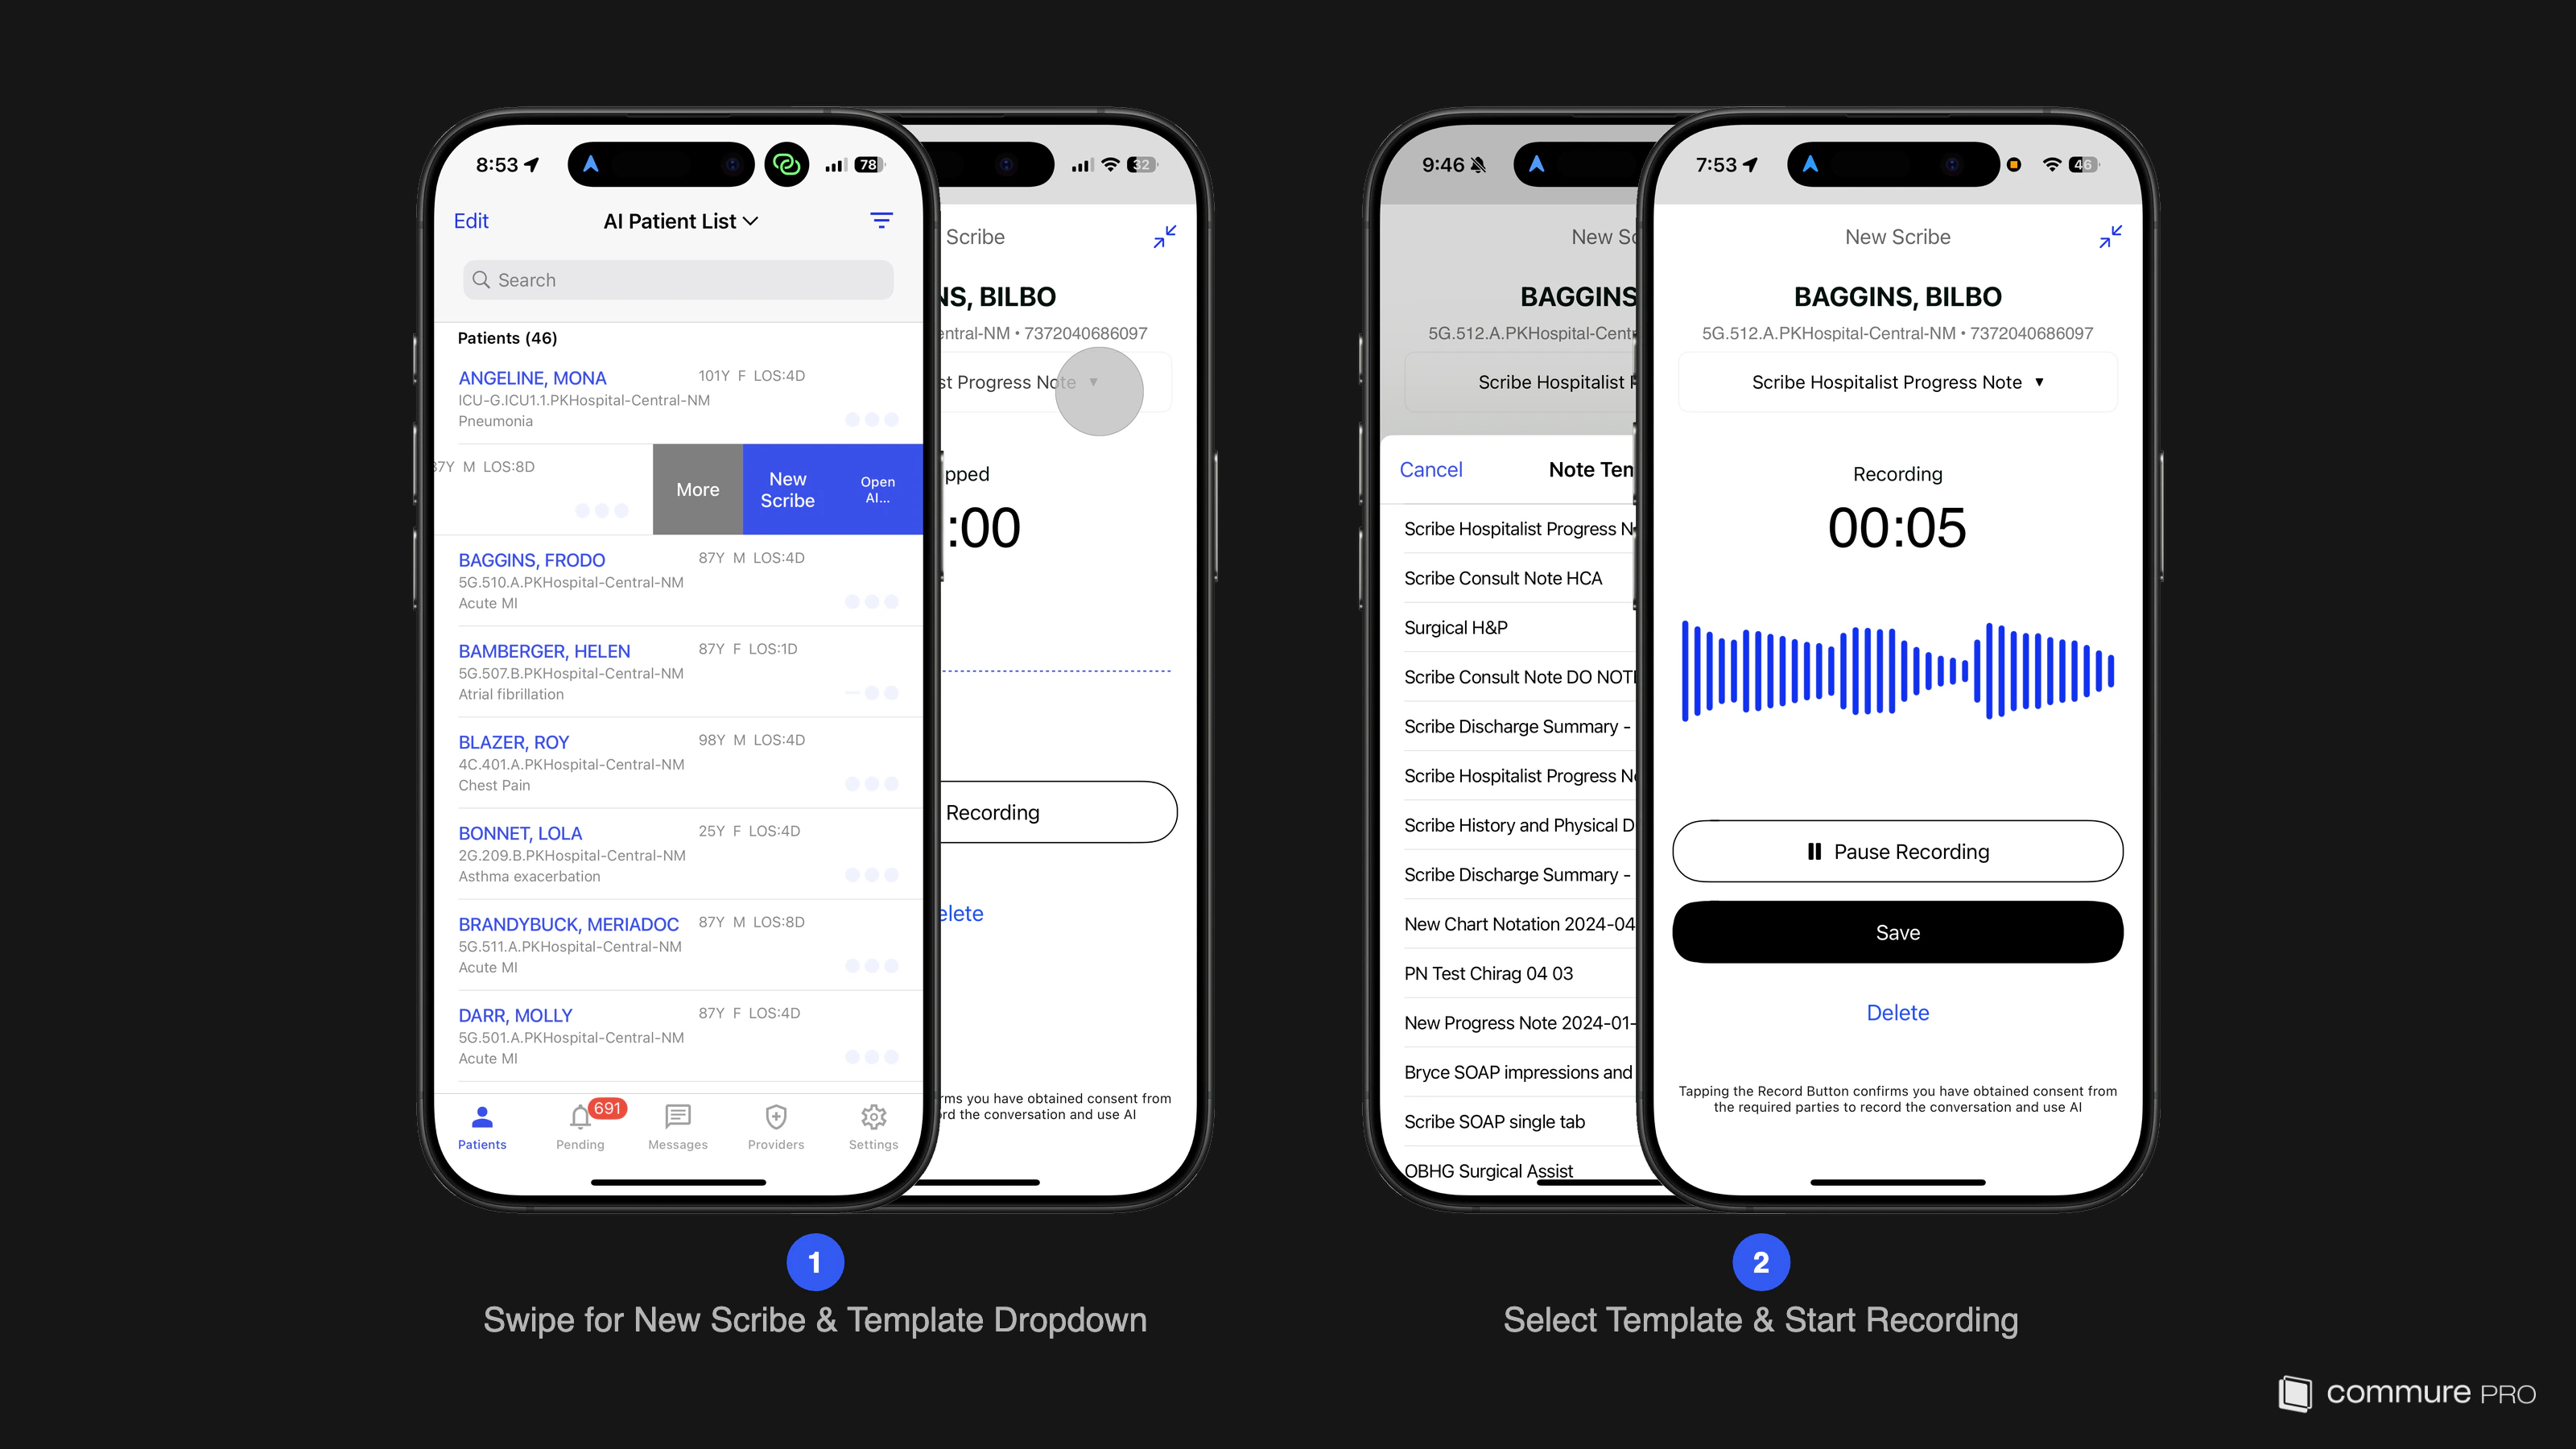
Starting a New Recording
Swipe left on a patient
From the Patient List, swipe left on the patient row and tap New Scribe. The recording screen opens with the patient’s name and identifiers already populated from the EHR. The panel also displays the patient’s location and account number below the patient name, allowing you to verify patient context without leaving the recording screen.If a paused recording already exists for this patient, you will also see a Resume Scribe option in the swipe actions.
Swiping left on a patient row reveals two configurable action buttons plus a More button that opens the full action menu. The Default button (furthest right) triggers automatically when you swipe the row fully to the left — no tap needed. The Custom button is the middle option. More is always present and cannot be reconfigured. Available actions include New Scribe, Resume Scribe, Open AI Copilot, Open AI Summary, Add Note, Add Charge, Add Task, and more. To configure which actions appear and their order, go to Settings > General > Swipe Options — see Preference Reference for details.
Choose a note template
Select a template from the dropdown (e.g., “Hospitalist Progress Note”). The template determines how the AI structures the sections of your generated note. You can change templates later if needed — see Note Actions.If no Provider Documents (PDocs) are available for the current date, the app displays the full list of Commure Pro templates so you can select one manually. When a single PDoc is available, it is selected automatically and cannot be changed.
Start Recording
Tap the Start Recording button. The timer begins and the app captures your conversation with the patient using your device’s microphone.
Tapping the Record button confirms you have obtained consent from the required parties to record the conversation and use AI. If your organization has enabled the consent pop-up, you will be prompted to confirm before recording begins.
Save the recording
When the encounter is finished, tap Save. The recording is uploaded and the AI generates your note. After saving, the audio uploads in the background — you can navigate away from the app or lock your device and the upload will continue. A confirmation appears when the upload completes. You can track the progress on the Accessing Your Notes screen.
Alternative: Using the + Button
If your swipe actions are configured for other activities, you can always start a recording from the + menu: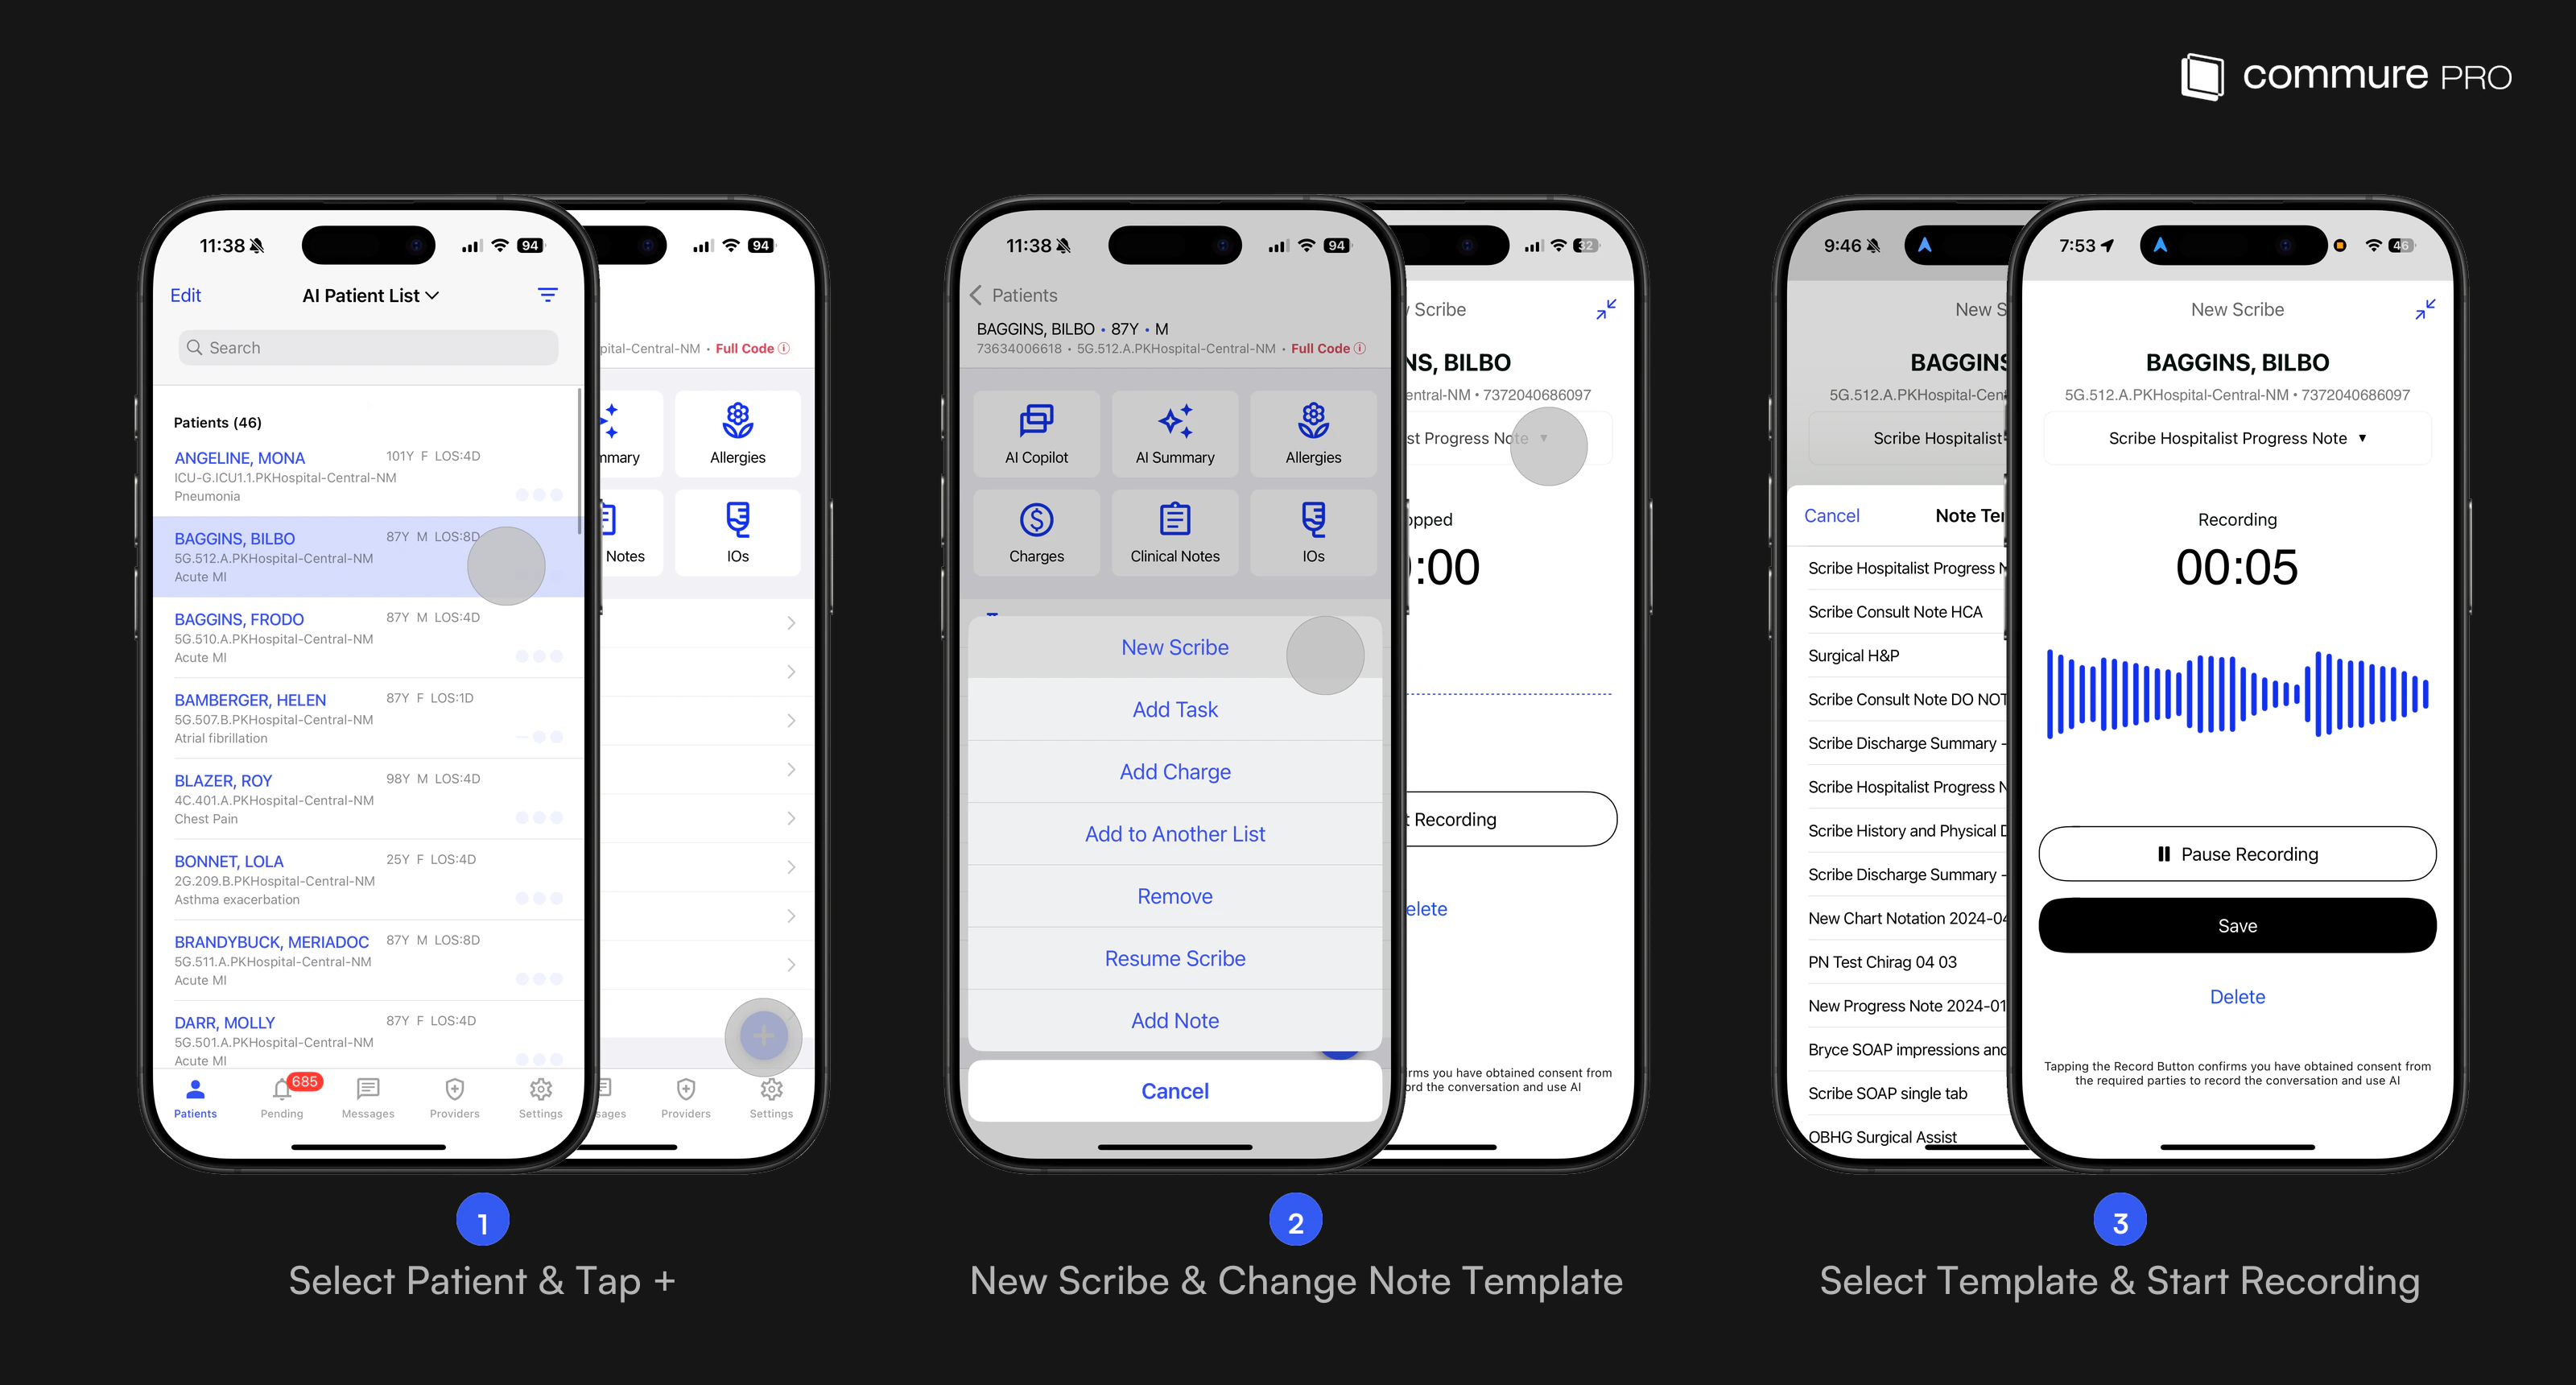
- Tap a patient in the Patient List to open their detail screen.
- Tap the blue + button in the bottom-right corner and select New Scribe.
- Choose a note template and tap Start Recording.
If you have a recording in progress for this patient, you will also see a Resume Scribe option in the action sheet.
Haptic Feedback
When you pause, save, or delete a recording, the app provides a haptic vibration to confirm the action. This tactile feedback lets you know the action was registered even when the screen is not visible — for example, if the device is in your pocket or face-down on a desk.Resuming a Paused Recording
If you need to step away during a recording, you can pause and resume later. There are two ways to resume: Via swipe:- Return to the patient in the Patient List.
- Swipe left on the patient row and tap More, then select Resume Scribe from the action sheet. If your organization has configured Resume Scribe as a direct swipe action, you can tap it directly without going through More.
- Confirm the session you want to resume in the dialog.
- Tap the patient to open their detail screen.
- Tap the blue + button and select Resume Scribe.
- Confirm the session you want to resume in the dialog.
If no paused recordings exist for the patient, selecting Resume Scribe will prompt you to start a new recording instead.
Tips for Best Results
- Position your device so the microphone can clearly capture both you and the patient. Avoid placing it in a pocket or face-down.
- Check the volume meter — if it is not moving, verify that Commure Pro has microphone permission in your device’s Settings > Privacy > Microphone.
- Use multi-syllable trigger words if you have configured Dot Phrases or Macros, as these are recognized more reliably than short words.
- Incoming calls on iOS automatically pause the recording as soon as the phone starts ringing — even if you do not answer. You must manually tap Resume to continue recording after the call ends or is dismissed. Android handles calls differently — see the Android recording guide.
Next Steps
Accessing Your Notes
Review your generated notes, transcripts, and audio playback.
Note Actions
Resume, edit, or provide feedback on a completed note.